This is officially the last post I will be making for my OBDF 110 course! In the past four months since I started this course, I have worked on several challenging projects that have allowed me to hone my 3D modelling skills. This post is a detailed recap of those major projects!
1. Objectified Response
My first Tinkercad project
For my first assignment, I created a detailed model of my desk area. I bought this Micke desk and drawer set about 10 years ago at Ikea, and I spend most of my time working in this space.
Gary Hustwit's documentary, Objectified, inspired me to create this model because it showed footage of Ikea products and discussed the idea of "democratization of design". The Micke work station is compatible with this concept because it is accessible, has a practical design, and has several "versions."
 |
| Photo of the products from Ikea's website |
It was very challenging to create this model because the file was large and Tinkercad could not process modifications to the model very well. It was also difficult to create this replica of my desk because the construction tools are very limited in Tinkercad. So, I simplified some of the objects and found tricks to make the process smoother. However, I think that the final result is very successful and I was able to achieve a good approximation to my reference!
2. Mesh Mashup
My first Meshmixer and Rhino 6 Project
In order to create the Potty Pony, I had to learn to combine meshes in Mesh Mixer and add materials and custom lighting in Rhino 6.
The Potty Pony is one of my most cursed and beloved inventions; it is a playful potty trainer for people of all ages!
I began to develop this concept in Tinkercad, along with many other necessary and totally-normal concepts:
 |
| 10 original 3D inventions I created using Tinkercad |
To learn more about these cursed inventions, click here.
After creating these Tinkercad concepts, I began to refine the Potty Pony model in MeshMixer.
In my MeshMixer blogpost, I explained:"This was my first time combining models in MeshMixer and it was incredibly challenging. Aside from the fact that the program crashed 47 times (I am not exaggerating), learning how to blend solids and apply custom shading made the process very intense."
As you can see, I experimented with the colour tools and painted the Potty Pony with a vaporware colour palette!
For the full MeshMixer Vaporwave Potty Pony blogpost, click here.
After creating the Vaporwave Potty Pony, I created a Pastel Potty Pony in Rhino 6. At the moment, this is the final version of this concept. I like this version the most because the colours are calming, the surface textures are pretty realistic, and the overall design is refined and well-intergrated. I would like to animate this model one day so that it is rocking back and forth--it would be entertaining.
3. Papercraft Object
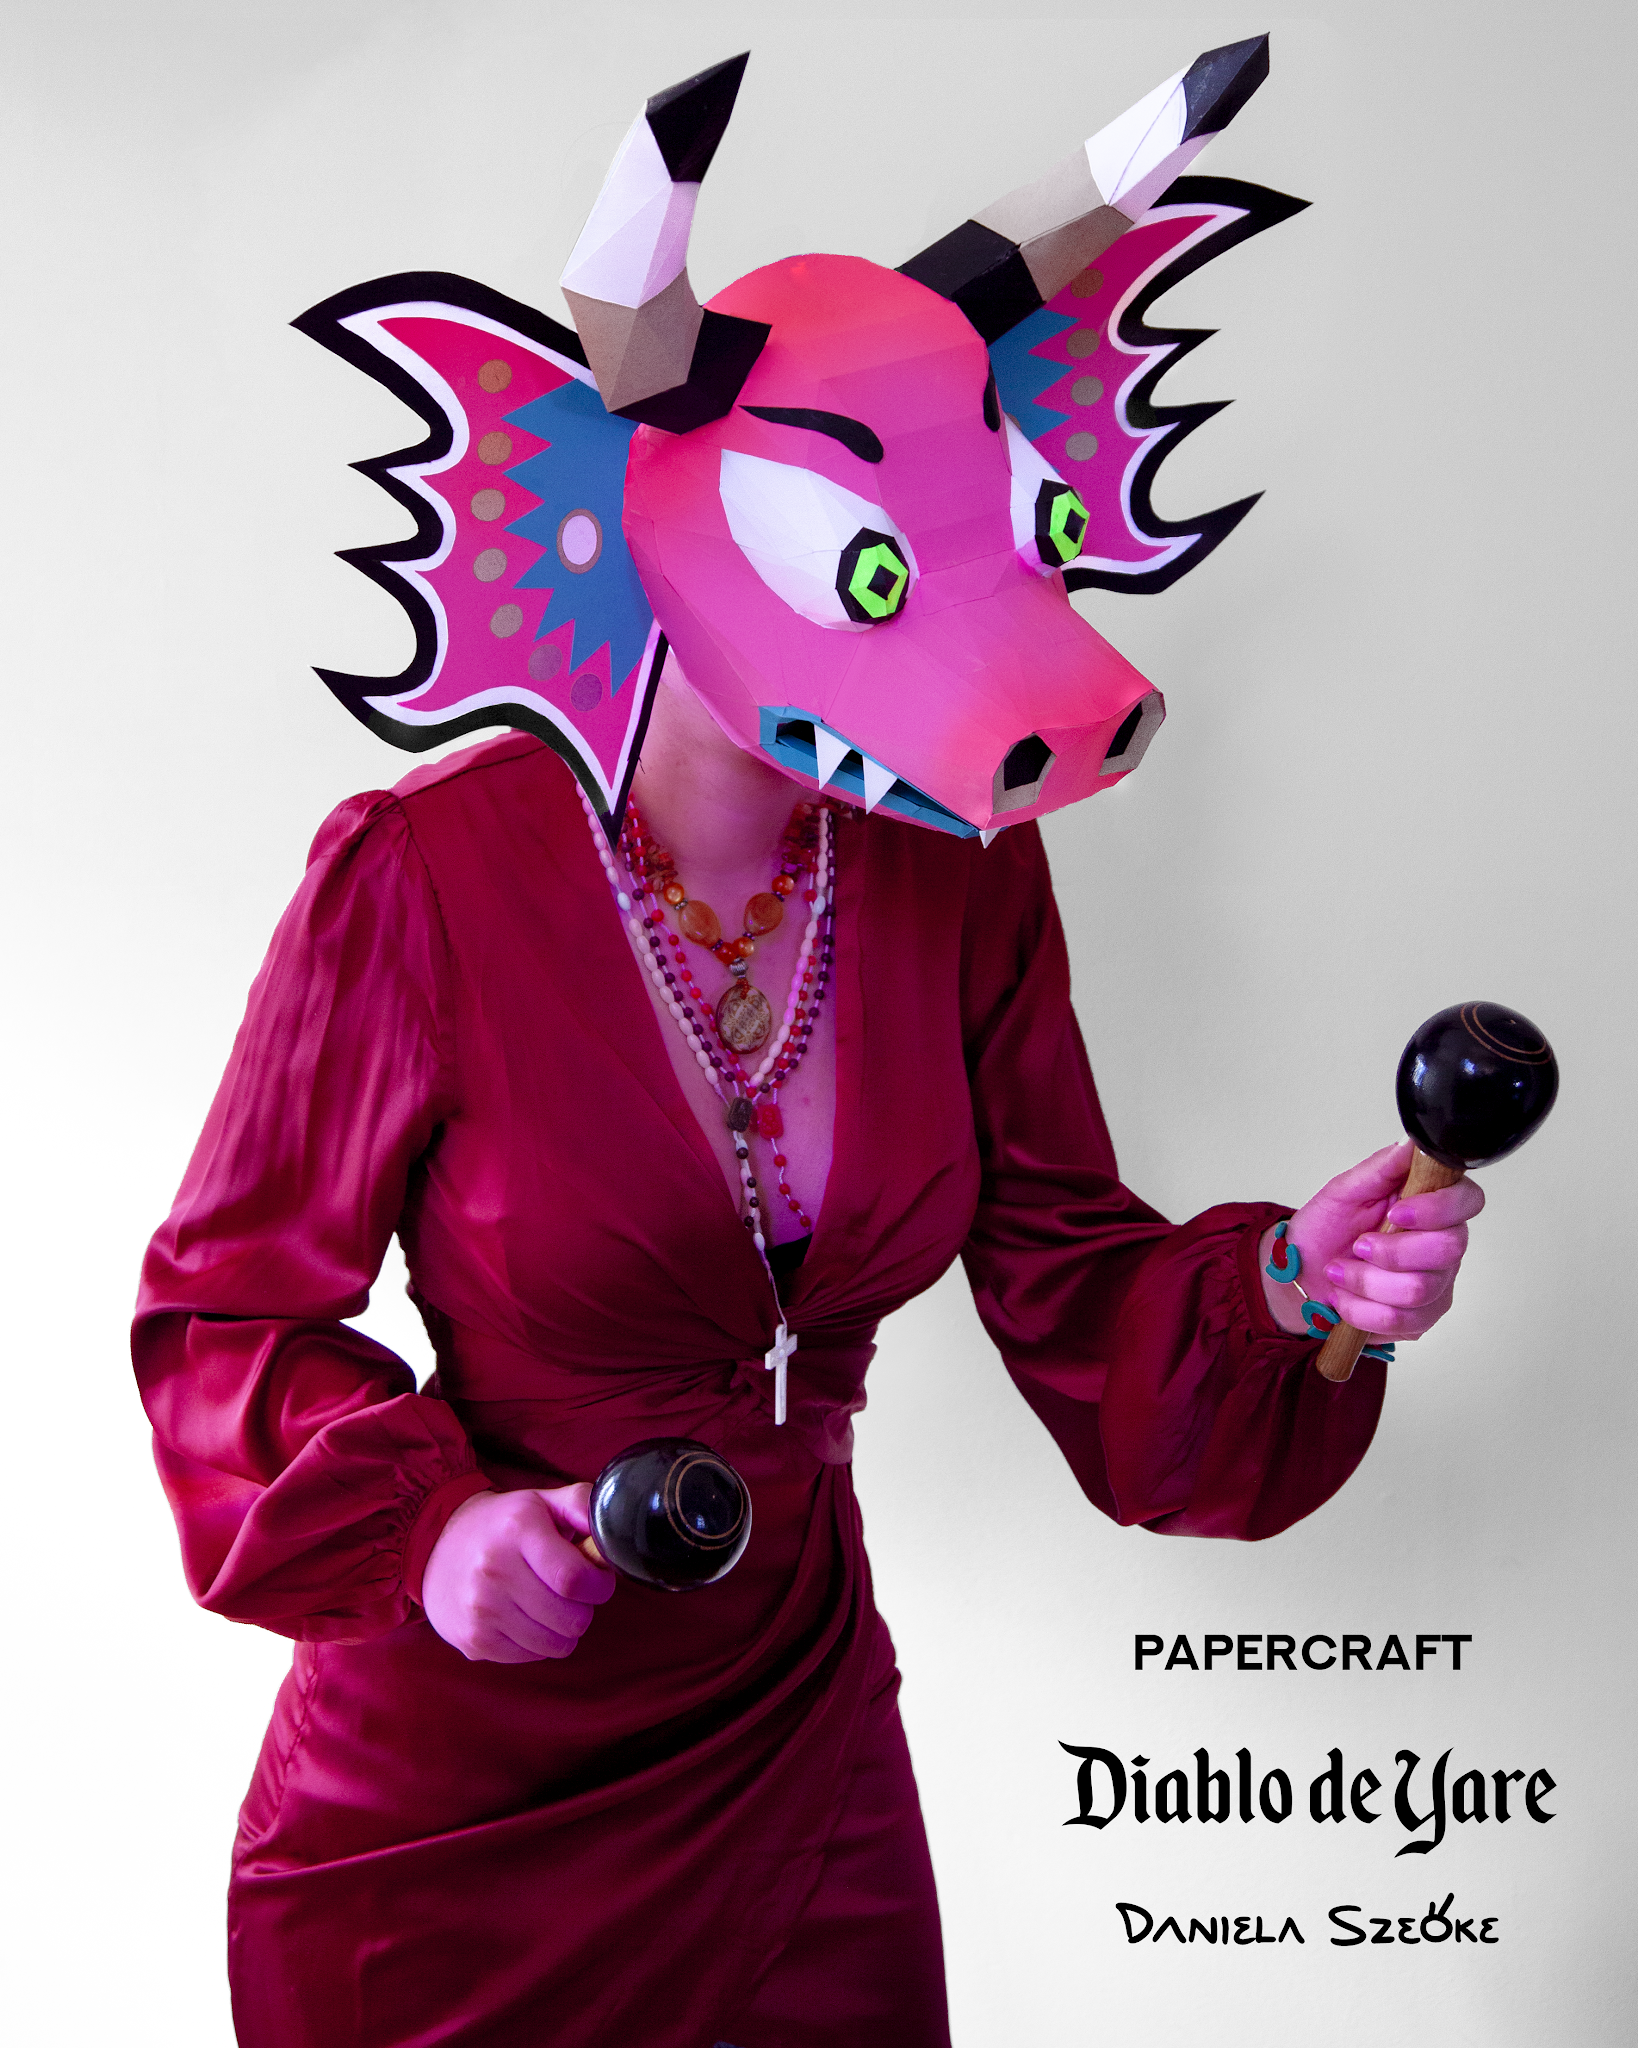
In homage to my Venezuelan heritage, I chose to make a geometric papercraft version of the traditional Diablo Danzante de Yare (Dancing Devils of Corpus Christi) mask.
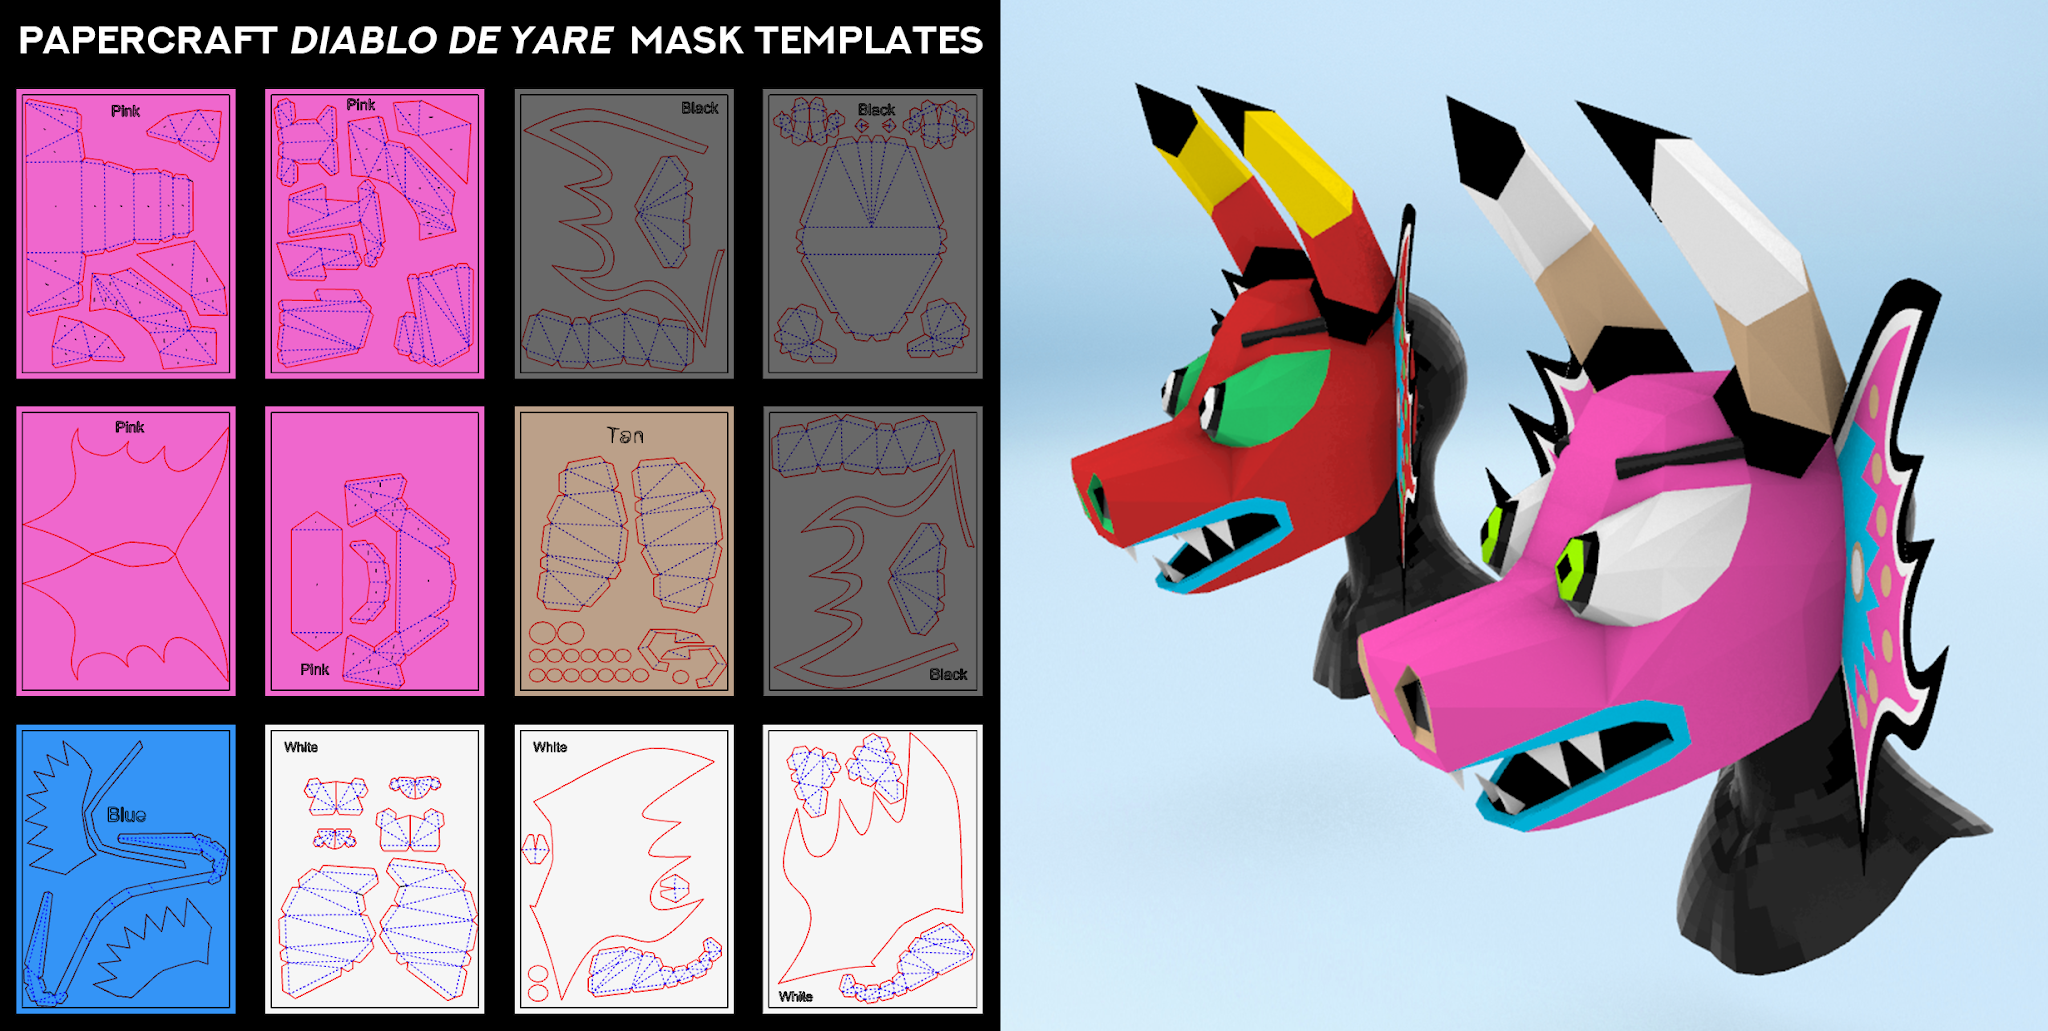
I designed the mask in Rhino 6, and used the 3D model to create a printable template that can be used to recreate the mask in cardstock paper.
Templates and 3D models are pictured below:

 |
| Image of the Papercraft Diablo Mask in natural lighting |
The construction process was very laborious and time-consuming due to the complexity of my design. However, I feel proud about the final outcome and I am encouraged to continue making Papercraft masks.
Now that I have completed this first papercraft project, I feel that my future attempts will be quicker and less exhausting.
To learn more about how I constructed the papercraft Diablo mask, check out the following process blogposts:
Before creating the Devil mask, I practised creating papercraft objects by making several geometric forms (pictured below).In my preparation to create the Diablo mask, I wanted to make sure that I could create paper templates from 3D models. So, I practiced designing natural, geometric, and architectural forms.
4. Hybrid 3D Model
I had the pleasure of creating Onion Boy with Ayla Ahmadova, one of my talented classmates from my 3D OBDF course. Onion Boy is a hybrid of two models; one of the models is Ayla's and the other one is mine. In the process of creating the hybrid, we also refined aspects of the model (such as the face and vertical curves) to produce a more aesthetically pleasing outcome.
The two models we combined were chosen from a selection of 15 concepts (6 of them were Ayla's and 9 of them were mine). All 9 of my preliminary concepts are presented below:
The selected model was used as a guide for the final concept, which is shown below:
The hybrid object functions as a plant vase since it has the appropriate shape: a wide base and a narrow opening.
Onion Boy's head, neck, and shoulder areas were sculpted in Rhino 6 using lofting and twisting commands. The eyes and mouth were sculpted in Meshmixer using the pinch brush and smoothing tools. To test the 3D printability of the Onion Boy model, Ayla and I ran it through the PrusaSlicer software which detects design errors.
Once the design appeared error free, Bryan Cera (our instructor) printed the model at the university.
The model had to get printed twice because the first one had a glitch on the chin area. The second model printed a lot better but got a few droopy glitches on the mouth area. Overall, the project was very successful and I am excited to see it in person once I pick it up from the university!
Once I bring the model home, I will also paint details on the face and place a plant inside of the head. I plan on making one more blogpost with those advancements.
Final Thoughts
Looking back on all the work I completed during this semester, I feel surprised by the progress I made and all the techniques I learned. I am very pleased with this course, and Bryan Cera, for helping me create a great volume of work that I am proud of. I am definitely interested in taking the 200 level of this course next school year!


Comments
Post a Comment